In my line of work, I do a ton of SharePoint installations and configurations for DEV, QA, UAT, Integration and Production environments, so anything that would help me automate and accelerate the process is a bonus to me. For years I have been a big fan of
Brian Lalancette’s SharePoint installation automation PowerShell tools (https://autospinstaller.codeplex.com) so I decided to do a step by step series of blogs for the aspiring SharePoint Administrator on how to use his tool. Although there are other step by step’s available which are pretty good, I thought I would put this in a concise format for myself and anyone else who may be interested in it.
I also show how you can use Brian’s (https://autospsourcebuilder.codeplex.com) and
Ivan Josipovic’s (https://autospinstallergui.codeplex.com) along with AutoSPInstaller to accelerate your SharePoint farm installations with pre-requisite integration/downloader and GUI’s to make configuration of your installation easier.
I have split this post into 4 series:
Note: Before you begin using this guide for consistency of all of your environments (especially PROD), be mindful of some of the items listed in the Post Installation steps.
System Setup – Part 1 of 4
This set of instructions illustrate some of the initial steps you should perform on the setup of your SharePoint system infrastructure before proceeding to install your SharePoint environment. It assumes some basic SharePoint 2013 infrastructure knowledge. My base OS and SQL assumptions you would use in this guide are Windows 2012 Server and SQL 2012 Server but you can adapt to any
supported versions of this software.
- Install your base Windows 2012 OS and SQL 2012 Environments for the SharePoint
farm of your choosing (i.e. SQL, WFE, OWA, AD) (http://technet.microsoft.com/en-us/library/ee667264(v=office.15).aspx -
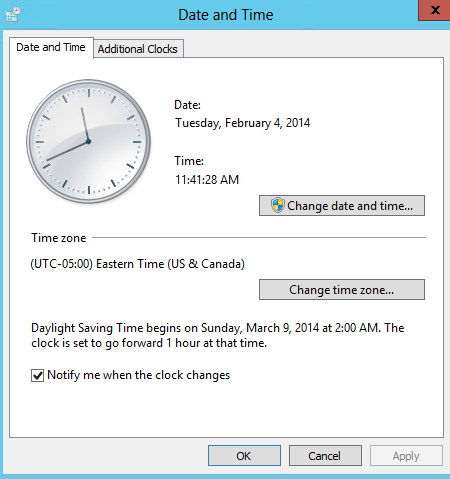
Ensure your time zone matches across all servers on your OS
-
(Optional: AutoSPInstaller now does this!) – Disable IE Security Config on SP server

-
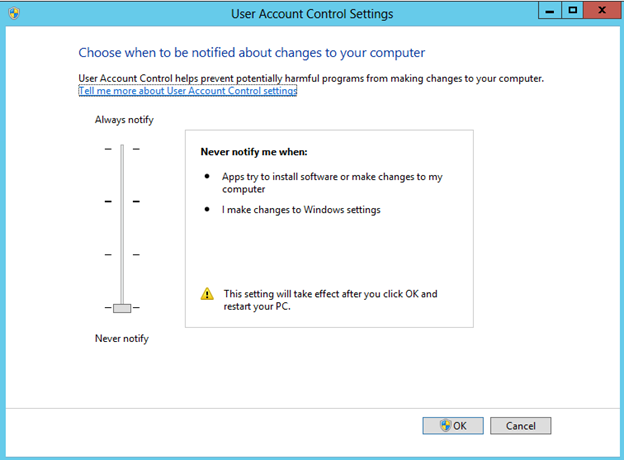
(Optional: AutoSPInstaller now does this!) – Disable UAC on SP Server
-
To allow automatic reboots of server during installation, disable warnings on open files (for unattended installs) by going to run
à gpedit.msc
à User Configuration
à Administrative Templates
à Windows Components
à Attachment Manager
à Add “.exe” “Inclusion list for low file types”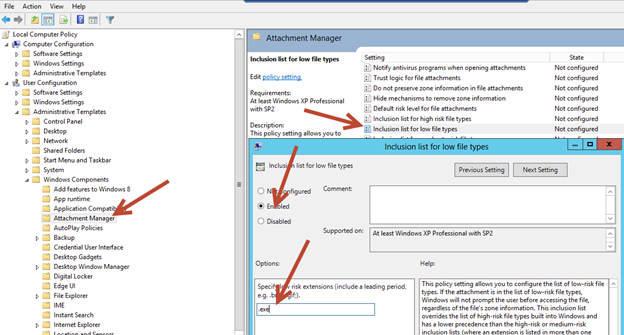
- Install Windows 2012 Pre-Req 1 –
http://go.microsoft.com/fwlink/p/?LinkID=268725 -
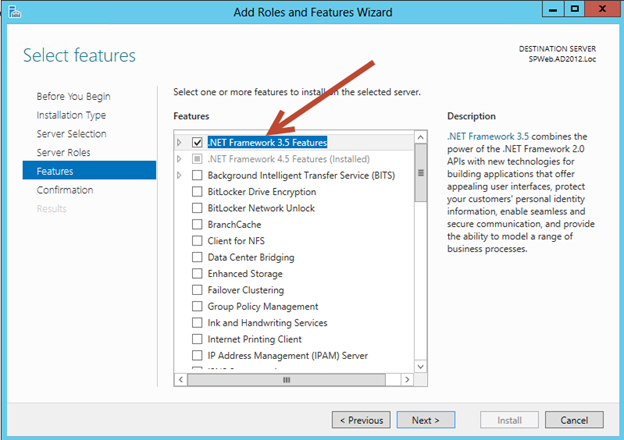
(Optional: AutoSPInstaller now does this!) – Install .NET 3.5 features from Server Manager

-
On your AD server, ensure service, admin/setup accounts with necessary machine and Active Directory permissions (an example of my setup below):
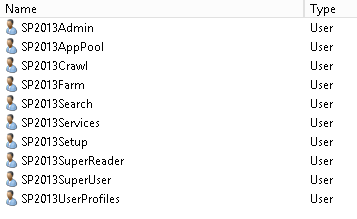
- Ensure SP2013Setup is local admin on all SP servers and securityadmin and dbcreator server role on SQL Server
- (Optional: AutoSPInstaller now does this!) – Ensure SP2013Farm is local admin ONLY during UPS provisioning on UPS server (remove after)
-
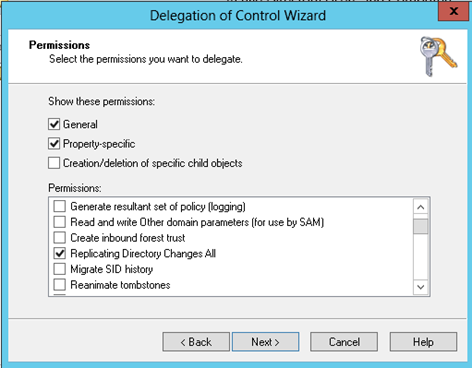
Ensure SP2013UserProfiles has replicate directory changes on AD -> Delegate permissions (http://technet.microsoft.com/en-us/library/hh296982(v=office.15).aspx)
-
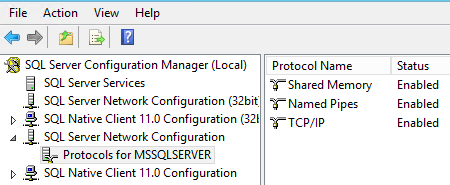
On your SQL Server, enable TCP/IP & Named Pipes under SQL Server Network Configuration
Click here to go to Part 2 of this series – Software Download.